
Have you ever wondered how frontend data is stored and synced with a backend server?
Every software engineer gets to the point where they have to know how to connect their frontends to DBs, and also store their data there.
My team has been building Cashvault, a personal finance protocol, and one of the things we had to fix was customers inputting data into a field, then getting to see the same on their dashboard, and the data should be available persistently in the database.
This tutorial is a mini-series on how you can build a fullstack FinTech app.
The best way to explain, I believe, is to build. As a result, we will be having a quick run through building a Next.js form and creating a table through the Neon SQL editor.
Pre-requisites
- Creating Your Next App
Create your Next.js app, preferably on Bash, with this general command:
npx create-next-app@latest balance-app --tsYou should see something like this in your terminal:
  --import-alias          "@/*"

Creating a new Next.js app in C:\Users\baptizer\Downloads\google\balance-app.

Using npm.

Initializing project with template: app-tw


Installing dependencies:
- next
- react
- react-dom

Installing devDependencies:
- @tailwindcss/postcss
- @types/node
- @types/react
- @types/react-dom
- eslint
- eslint-config-next
- tailwindcss
- typescript


added 431 packages, and audited 432 packages in 3m

176 packages are looking for funding
  run `npm fund` for details

2 moderate severity vulnerabilities

To address all issues (including breaking changes), run:
  npm audit fix --force

Run `npm audit` for details.

Generating route types...
✓ Types generated successfully

Initialized a git repository.

Success! Created balance-app at C:\Users\baptizer\Downloads\google\balance-appGo ahead to change your Directory to the balance-app by inputting:
cd mini-balance-app - Neon Account Opening and CLI Installation
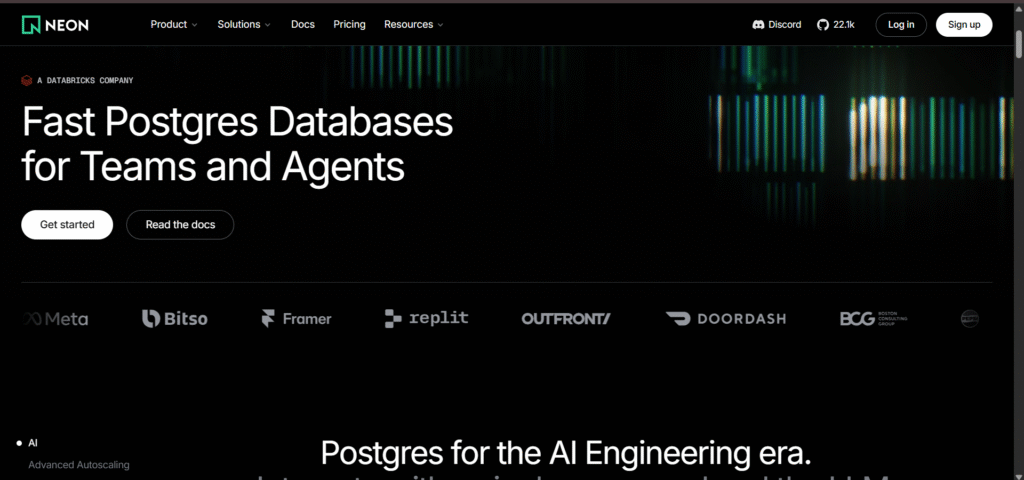
For the data persistence, we will be using Neon, a serverless PostGres database, to handle everything DB. Of course, there are other good options like Convex, Supabase, and the rest.
But Neon works just fine, so we can go ahead with it. This is where you will go ahead to open an account so you can store your database on the tool.
- Go to the website and create an account
- Install its package to your application with:
npm install @neondatabase/serverless With this done, we can go ahead to the crux of the tutorial.
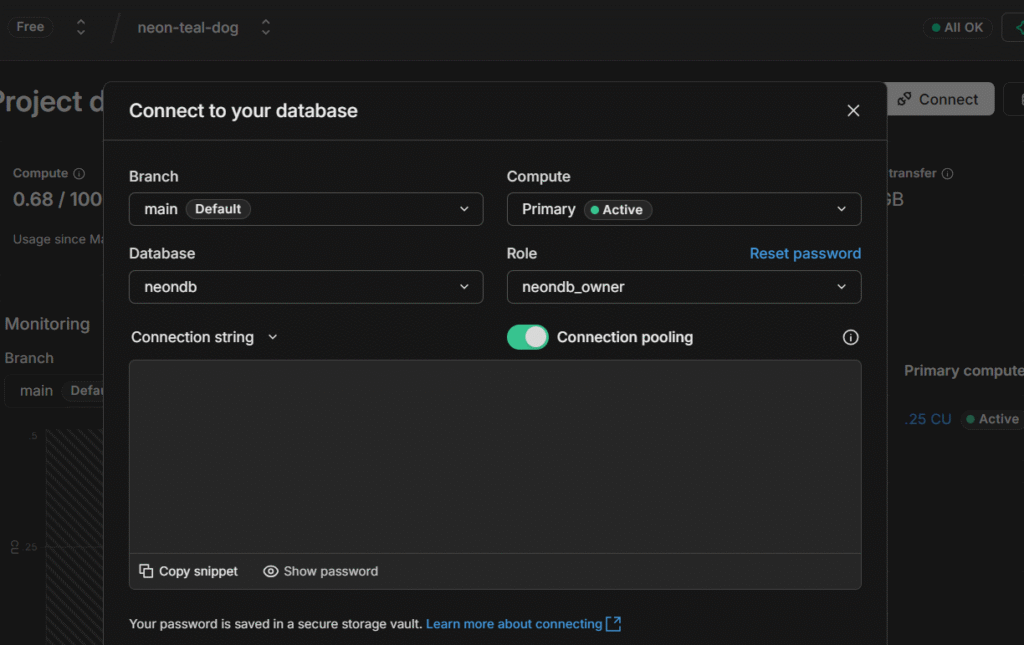
- Get Your Connection String
You need this to connect your codebase to your Neon database. It’s a secret, therefore, ensure to keep it well and not push it to main at all or plainly.
Create an .env.local file:
DATABASE_URL=your_secret
You can get it from your dashboard:
Project Structure
This is how your project structure will look:
└── mini-balance-app/
    ├── app/
    │   ├── api/
    │   │   ├── save/
    │   │   │   └── get/
    │   │   │       └── route.ts
    │   │   └── route.ts
    │   ├── favicon.ico
    │   ├── globals.css
    │   ├── layout.tsx
    │   └── page.tsx
    ├── lib/
│ └── db.tsWriting the SQL Schema for the Database
There are 2 options on the editor where we can write the schema. It is either we write it right within our codebase, or directly in Neon SQL Editor.
I preferred the former anyway, so I won’t have to switch many tabs. Nonetheless, I will show you how to do both. Here is the schema:
CREATE TABLE IF NOT EXISTS accountability (
    id SERIAL PRIMARY KEY,
    name TEXT NOT NULL,
    savings_goal NUMERIC(12, 2) NOT NULL,
    created_at TIMESTAMPTZ NOT NULL DEFAULT NOW()
);
This is a schema that creates the accountability table in our database. Each customer entry has unique identifiers and also auto-increments.
The main data we want to collect is name, and savings_goal which should have a maximum of 12 numbers along with 2 decimal points.
Lastly, customers will provide entries from across the world, their timestamps with respect to their timezones should be recorded accordingly.
You can simply paste this in your Neon database:
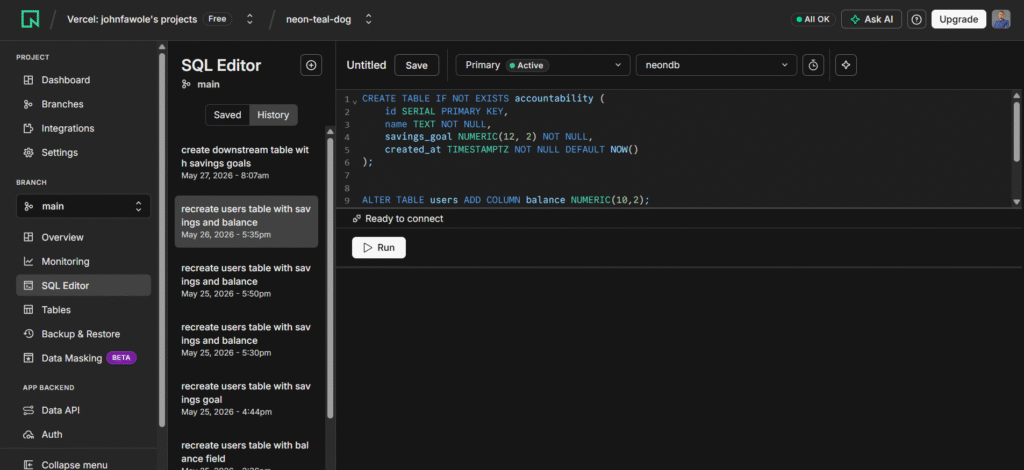
Check under the tables tab, and you’ll see that the accountability table is already created.
That said, let’s go through the other route of creating the table and setting up its schema right from your VS Code or other editors.
First of all create a db.ts file within a lib folder, then paste this:
import { neon } from "@neondatabase/serverless";

export const sql = neon(process.env.DATABASE_URL!);

export async function ensureAccountabilityTable() {
  await sql`
    CREATE TABLE IF NOT EXISTS accountability (
      id SERIAL PRIMARY KEY,
      name TEXT NOT NULL,
      savings_goal NUMERIC(12, 2) NOT NULL,
      created_at TIMESTAMPTZ NOT NULL DEFAULT NOW()
    )
  `;
}In addition to the schema above, we imported neon from the @neondatabase/serverless we imported from our CLI earlier.
We created an sql variable that we used to process our secret, and then create our query programmatically.
Creating the POST and GET APIs
Since we need to pipe data around, we will have to make forwarding and returning calls, and this is why we will have to create a few API files in our app directory.
- The GET API
import { ensureAccountabilityTable, sql } from "@/lib/db";

export async function GET() {
try {
await ensureAccountabilityTable();

const result = await sql`
  SELECT id, name, savings_goal, created_at
  FROM accountability
  ORDER BY id DESC
  LIMIT 1
`;

return Response.json(result[0] ?? null);
} catch (error) {
const errorMessage = error instanceof Error ? error.message : String(error);
console.error("GET /api/save/get error:", errorMessage);
return Response.json({ error: errorMessage }, { status: 500 });
}
}
If you remember well, we created an ensureAccountabilityTable() table in our <a href="db.ts">db.ts</a> earlier. We will be referencing it for our GET requests.
Simply put, we awaited the response from the SQL database, and demanded that it returns the data of each row in a JSON format.
Then we put in error handling variables so we can easily diagnose when things go wrong.
- The POST API
import { ensureAccountabilityTable, sql } from "@/lib/db";

export async function POST(req: Request) {
  try {
    const body = await req.json();
    const name = String(body.name ?? "").trim();
    const savingsGoal = Number(body.savingsGoal);

    if (!name) {
      return Response.json({ error: "Name is required." }, { status: 400 });
    }

    if (!Number.isFinite(savingsGoal) || savingsGoal <= 0) {
      return Response.json(
        { error: "Savings goal must be a positive number." },
        { status: 400 },
      );
    }

    await ensureAccountabilityTable();

    const [accountabilityEntry] = await sql`
      INSERT INTO accountability (name, savings_goal)
      VALUES (${name}, ${savingsGoal})
      RETURNING id, name, savings_goal, created_at
    `;

    return Response.json({
      success: true,
      entry: accountabilityEntry,
    });
  } catch (error) {
    const errorMessage = error instanceof Error ? error.message : String(error);
    console.error("POST /api error:", errorMessage);
    return Response.json({ error: errorMessage }, { status: 500 });
  }
}At the initial part of this request, we created name and savings_goal variables as the entries customers will have to make.
Take note of the accountabilityEntry variable because this is the part where we get to push data into the accountability table in our Neon once customers input fields into the form.
Building the Frontend
We’ve done our homework by building the database where the customer details will be stored and retrieved. But remember, we can only get that data through an interface where people can interact with it.
Step 1: Type Definition and Home Function
"use client";

import { useState } from "react";

type AccountabilityEntry = {
  id: number;
  name: string;
  savings_goal: string;
  created_at: string;
};

export default function Home() {
  const [name, setName] = useState("");
  const [goal, setGoal] = useState("");
  const [savedData, setSavedData] = useState<AccountabilityEntry | null>(null);
  const [message, setMessage] = useState("");
  const [isSaving, setIsSaving] = useState(false);
const [isLoading, setIsLoading] = useState(false);This is the beginning of the page.tsx. One of the first things we had to do is to create types, since we are using TypeScript after all, for our data like id, name, and savings goal.
It’s similar to creating constant variables in JavaScript.
Then we have to create the home page component. Recall that we had to import useState earlier because customers will be inputting dynamic values and we will want to have them stored on the go.
In const [name, setName] for instance, name is the storing variable for what the customer inputs, while setName populates it.
Step 2: Save Data Function
  async function saveData() {
    setMessage("");
    setIsSaving(true);

    try {
      const res = await fetch("/api", {
        method: "POST",
        headers: {
          "Content-Type": "application/json",
        },
        body: JSON.stringify({
          name,
          savingsGoal: goal,
        }),
      });

      if (!res.ok) {
        const errorData = await res.json().catch(() => ({}));
        throw new Error(errorData.error || `Save failed: ${res.status}`);
      }

      const data = await res.json();
      setSavedData(data.entry);
      setMessage("Saved to Neon.");
    } catch (error) {
      const message = error instanceof Error ? error.message : String(error);
      setMessage(`Failed to save: ${message}`);
    } finally {
      setIsSaving(false);
    }
  }
Here, we connected to our POST API, and demanded that the body of the incoming HTTP call consists of name and savings_goal. Once we get that data, we save it to Neon and also echo the same.
Step 3: Get Data Function
  async function getData() {
    setMessage("");
    setIsLoading(true);

    try {
      const res = await fetch("/api/save/get");
      if (!res.ok) {
        const errorData = await res.json().catch(() => ({}));
        const errorMsg = errorData.error || `API error: ${res.status}`;
        throw new Error(errorMsg);
      }
      const data = await res.json();
      setSavedData(data);
      setMessage(data ? "Loaded your latest entry." : "No saved entries yet.");
    } catch (error) {
      const message = error instanceof Error ? error.message : String(error);
      console.error("Failed to fetch data:", message);
      setMessage(`Failed to load data: ${message}`);
    } finally {
      setIsLoading(false);
    }
  }

 const formattedGoal = savedData
    ? new Intl.NumberFormat("en-US", {
        style: "currency",
        currency: "USD",
      }).format(Number(savedData.savings_goal))
: "";This is the function that enables customers to see what they input. It accesses the saved data in the API, loads it, and sends it back to the customer.
Step 4: Formatting Savings Goal Field
  const formattedGoal = savedData
    ? new Intl.NumberFormat("en-US", {
        style: "currency",
        currency: "USD",
      }).format(Number(savedData.savings_goal))
: "";We want to format the amount that the users input, such that it will read as “$5000.00”. This is important because we want to keep our database as neat as possible.
Step 5: Styling the Body
return (
    <main
      style={{
        minHeight: "100vh",
        display: "flex",
        justifyContent: "center",
        alignItems: "center",
        flexDirection: "column",
        gap: "20px",
        padding: "24px",
        fontFamily: "Arial, Helvetica, sans-serif",
        background: "#f7faf8",
        color: "#17211b",
      }}
>In styling the body of the page, we have to specify height, alignment, padding, and every other thing that will make the body beautiful. Most importantly, we got to define the colors we want.
Step 6: Styling the Placeholders
<section
        style={{
          width: "100%",
          maxWidth: "420px",
          display: "flex",
          flexDirection: "column",
          gap: "16px",
        }}
      >
        <h1 style={{ fontSize: "32px", margin: 0 }}>Accountability</h1>

        <label style={{ display: "grid", gap: "8px", fontWeight: 700 }}>
          Name
          <input
            placeholder="Enter your name"
            value={name}
            onChange={(e) => setName(e.target.value)}
            style={{
              border: "1px solid #bac8bf",
              borderRadius: "8px",
              padding: "12px",
              font: "inherit",
            }}
          />
        </label>

        <label style={{ display: "grid", gap: "8px", fontWeight: 700 }}>
          Savings goal
          <input
            min="1"
            placeholder="Enter savings goal"
            type="number"
            value={goal}
            onChange={(e) => setGoal(e.target.value)}
            style={{
              border: "1px solid #bac8bf",
              borderRadius: "8px",
              padding: "12px",
              font: "inherit",
            }}
          />
</label>We created our h1 and named it Accountability. Then we had several labels like Name with placeholder Enter your name. We connected this with setName which we already defined in our database to store naming entries.
We did the same for saving goals.
Step 7: Building the Buttons
        <button
          disabled={isSaving}
          onClick={saveData}
          style={{
            border: 0,
            borderRadius: "8px",
            padding: "12px 16px",
            cursor: isSaving ? "not-allowed" : "pointer",
            background: "#0b6b3a",
            color: "white",
            font: "inherit",
            fontWeight: 700,
          }}
        >
          {isSaving ? "Saving..." : "Save data"}
        </button>

        <button
          disabled={isLoading}
          onClick={getData}
          style={{
            border: "1px solid #0b6b3a",
            borderRadius: "8px",
            padding: "12px 16px",
            cursor: isLoading ? "not-allowed" : "pointer",
            background: "white",
            color: "#0b6b3a",
            font: "inherit",
            fontWeight: 700,
          }}
        >
          {isLoading ? "Loading..." : "See what you input"}
        </button>

        {message && <p style={{ margin: 0 }}>{message}</p>}

        {savedData && (
          <div
            style={{
              border: "1px solid #cbd8cf",
              padding: "16px",
              borderRadius: "8px",
              background: "white",
            }}
          >
            <p>
              <strong>Name:</strong> {savedData.name}
            </p>

            <p>
              <strong>Savings Goal:</strong> {formattedGoal}
            </p>
          </div>
        )}
      </section>
    </main>
  );
}We created 2 buttons:
- Save Data, and
- See What You Input
You can style these buttons however you want.
Results
Check out the full code in this repo.
Now, here is the result of what we’ve been building:
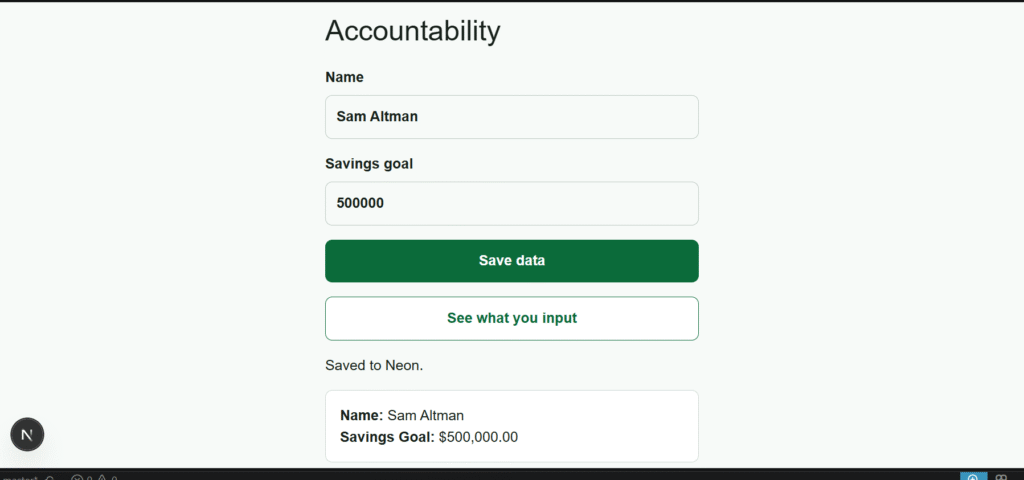
You can see how we filled those fields with data. After saving it, the customers can even click to see what they input.
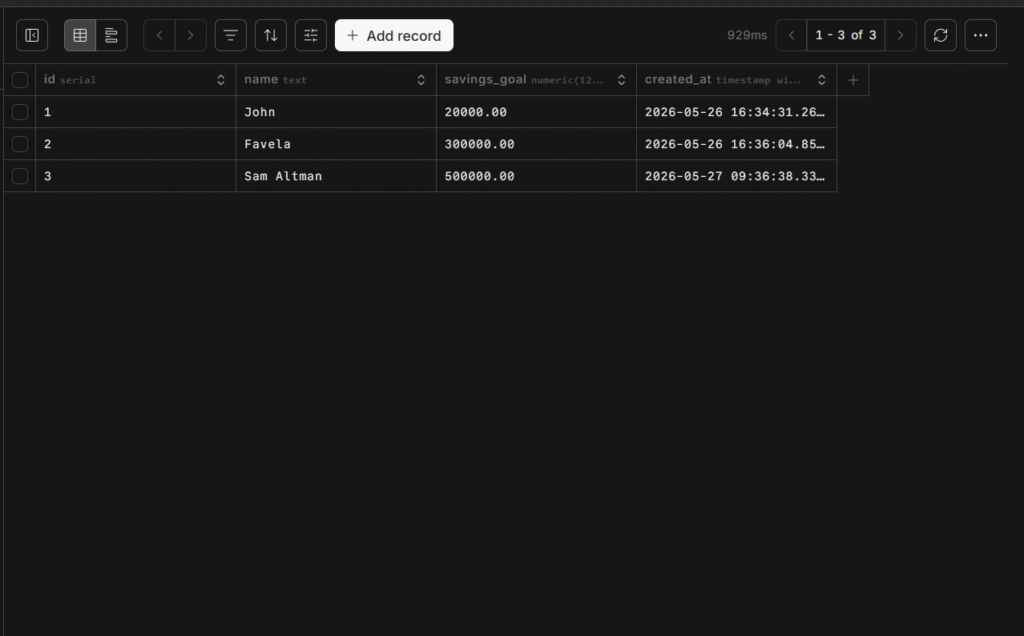
But beyond that, we can also see all these data in our Neon Console, like this:
Conclusion
The moment you get serious with building production-level applications, especially for crypto and FinTech customers, then you must dip your foot into database management.
At this stage, it’s not just about how cute your UI is, you must be able to manage user data, track them to ensure the best experience.
And this is where Backend-as-a-Service tools like Neon become necessary to scale.
Up next, I’m thinking of creating another tutorial for you to roll Auth from your database provider, let me know if you’d love to read that!